
워드프레스 ithemes security 소개
워드프레스는 워낙 유명한 프로그램이기 때문에 많은 공격을 받습니다.
워드프레스를 보호하기 위해서는 보안을 위한 플러그인을 설치하는 것이 좋습니다.
이번에는 ithemes security에 대해서 소개해보겠습니다.
ithemes security 설치하기
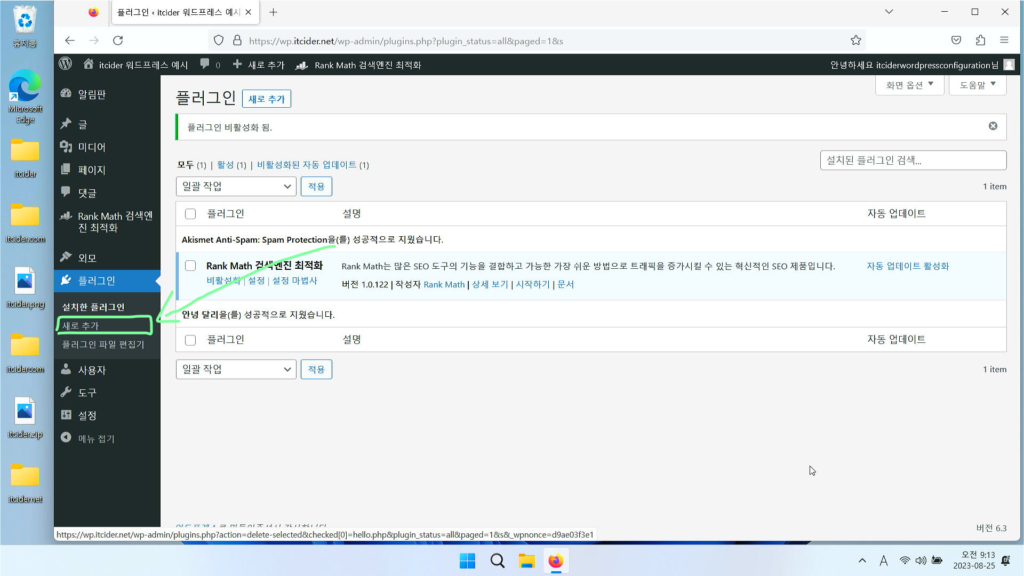
[플러그인] > [새로 추가]를 눌러주세요.
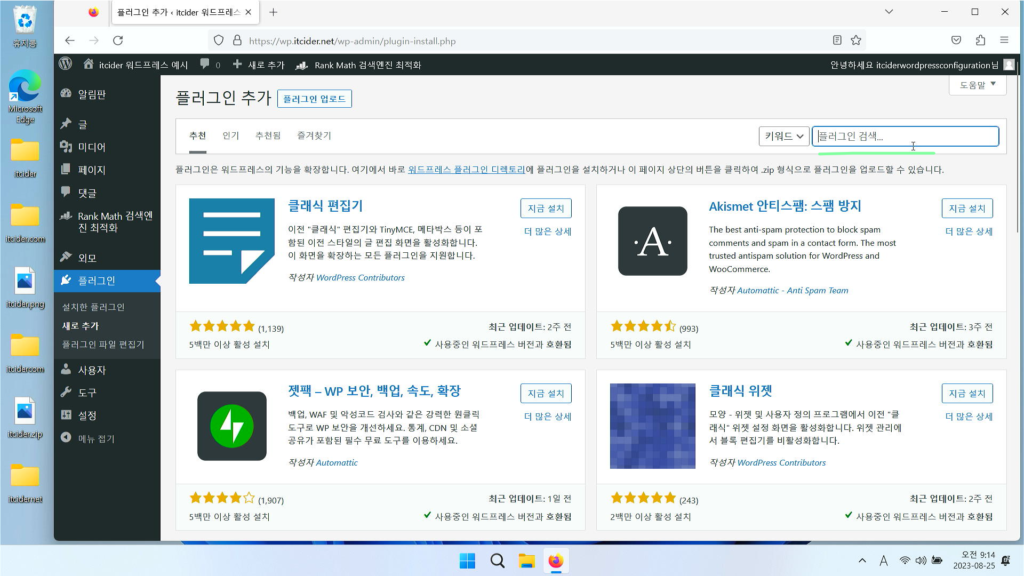
플러그인 검색에서 “ithemes”라고 입력해주세요.
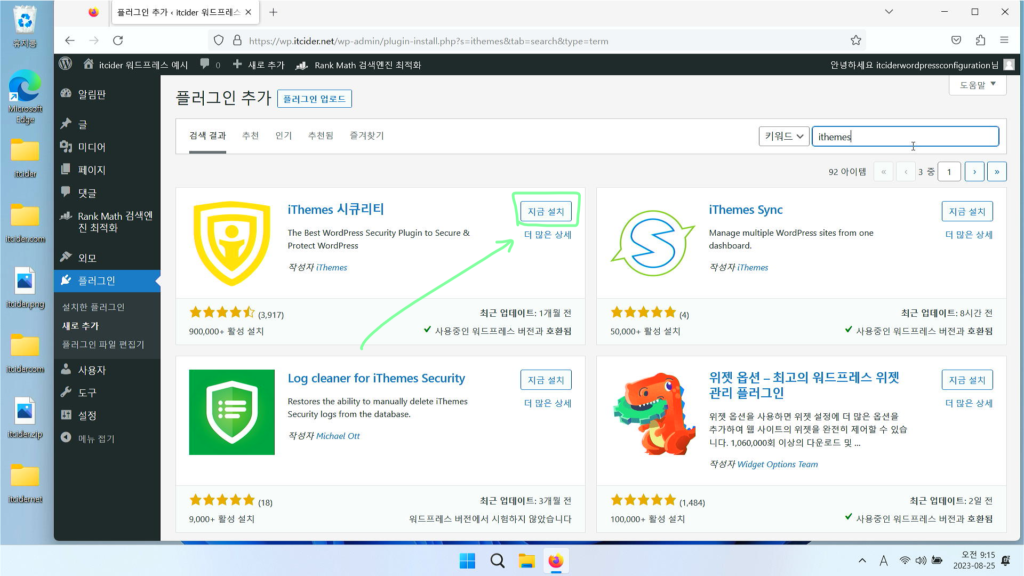
ithemes security 항목이 나오면 [지금 설치]를 눌러주세요.

[활성화]를 눌러서 ithemes security를 활성화해주세요.
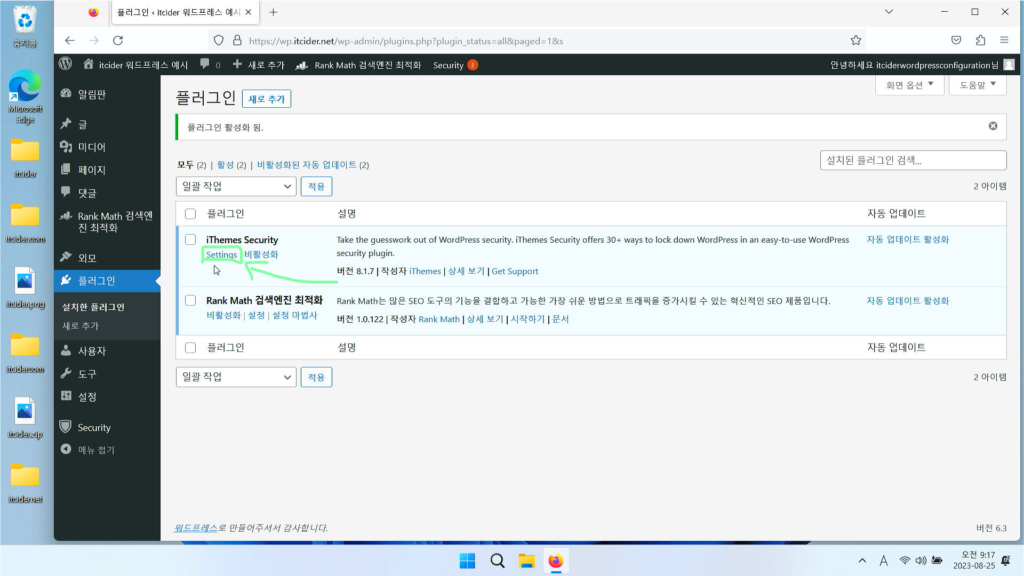
이렇게 플러그인 화면이 나오면 ithemes security를 활성화하기 위해서 settings를 눌러주세요.
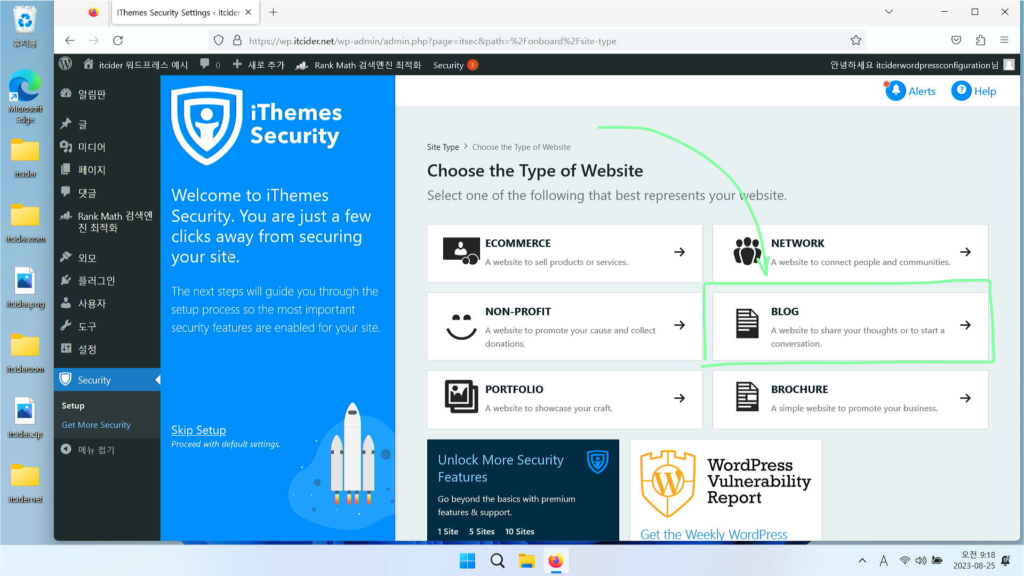
이렇게 ithemes 설정이 나오면 [blog]를 눌러주세요.

이렇게 enable security check pro 옵션이 나오는데, ithemes 서버로 보내는 설정이라 무시하고 [next]를 누르겠습니다.
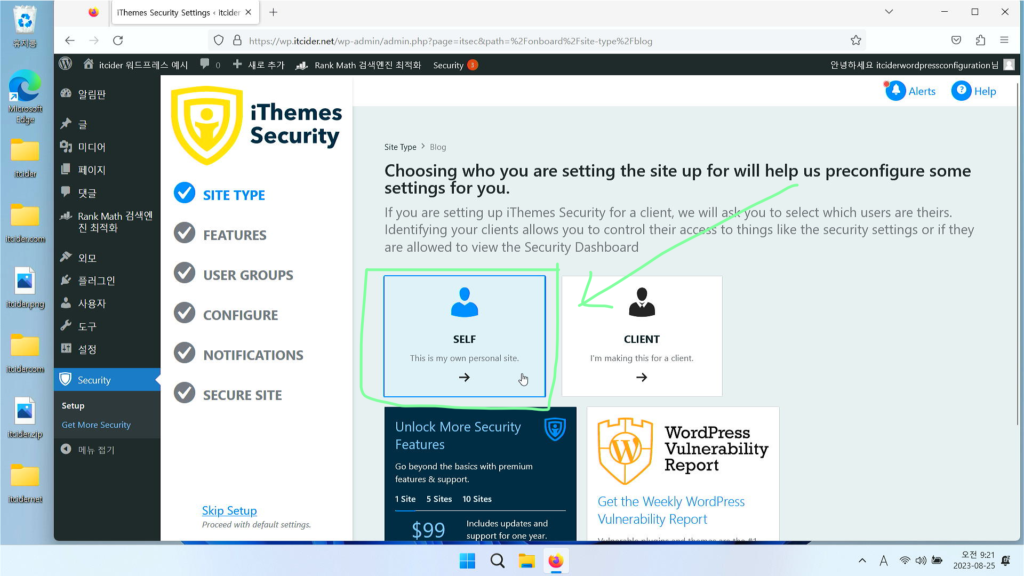
보통은 자신의 웹사이트를 위해서 사용하므로 [self]를 눌러주세요.
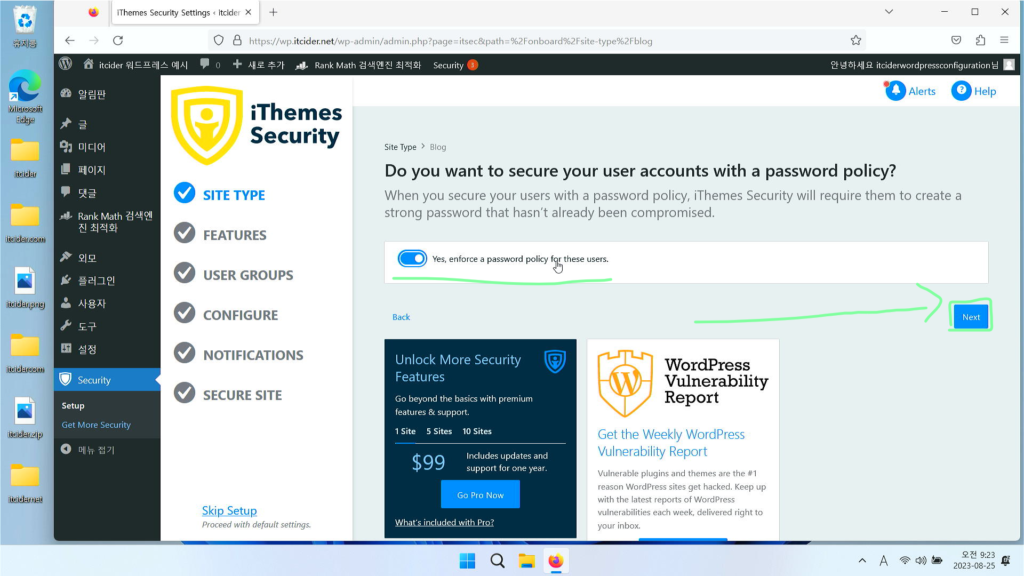
다른 유저에게도 비밀번호 규칙을 사용할 것인지에 대한 것인데, 다른 유저가 있다면 무조건 켜주셔야 합니다.
[next]를 누르겠습니다.
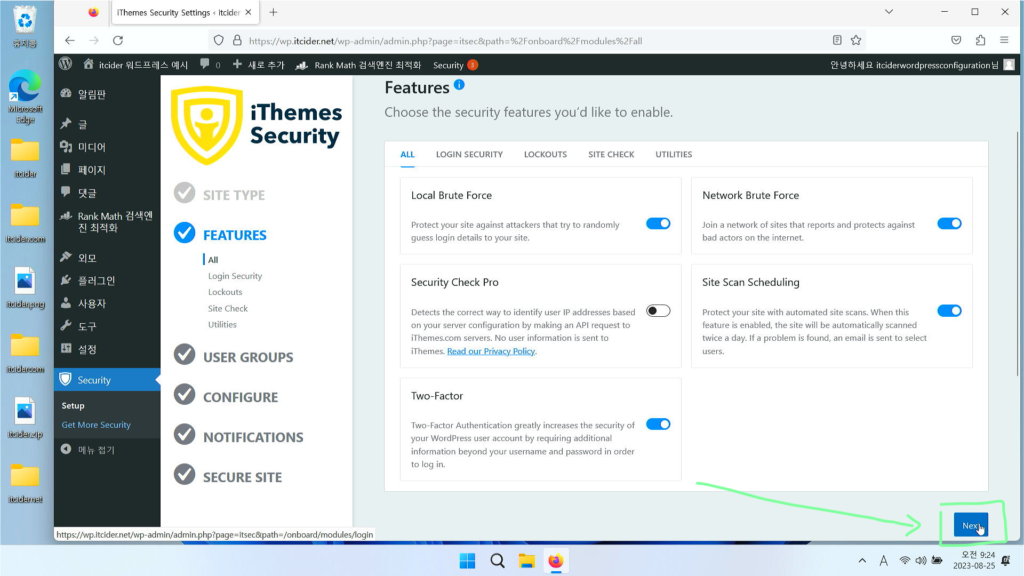
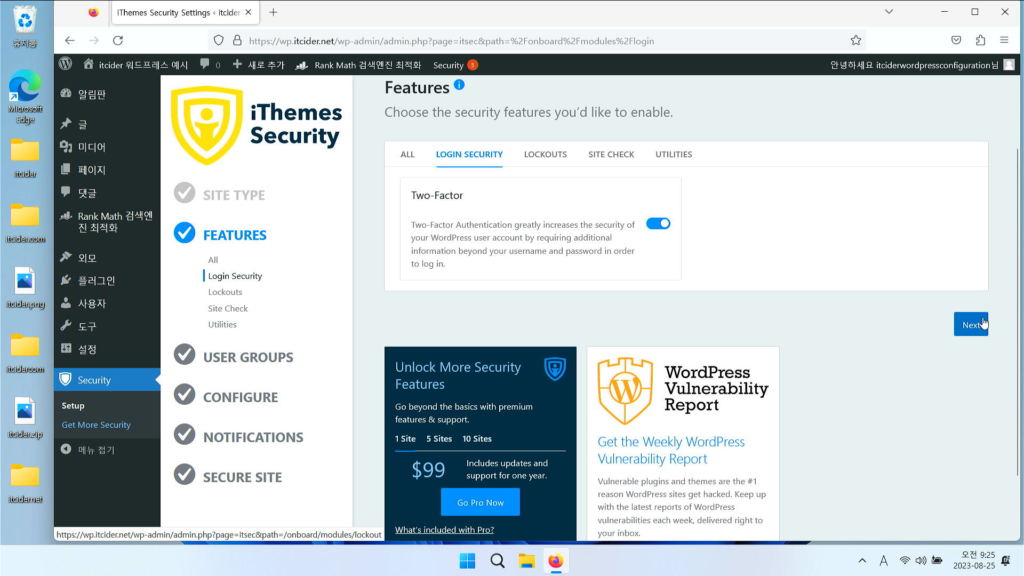
2단계 인증과 site scan scheduling을 켜주시고 [next]를 눌러주세요.
아까 설정과 동일하므로 [next]를 눌러주세요.
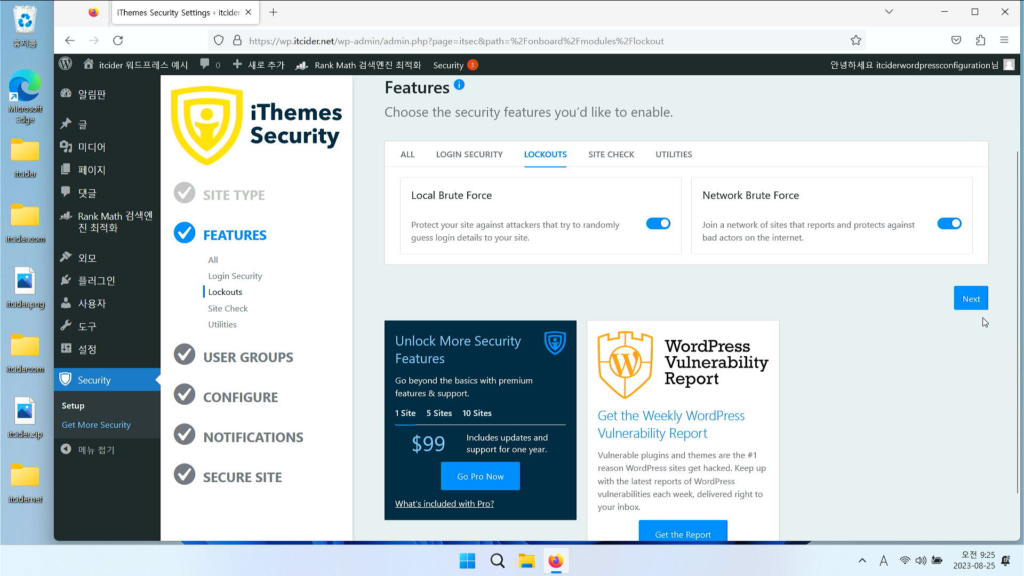
아까 설정과 동일하므로 [next]를 눌러주세요.

아까 설정과 동일하므로 [next]를 눌러주세요.
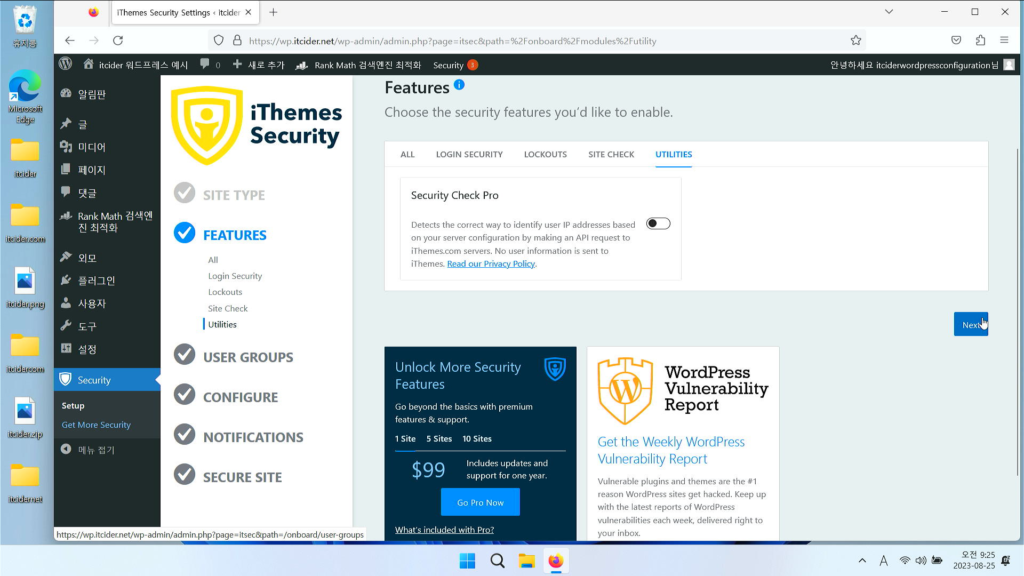
security check pro는 ithemes 서버에 ip 관련 요청을 보내는 것이므로 허용하지 않고 next로 진행하겠습니다.
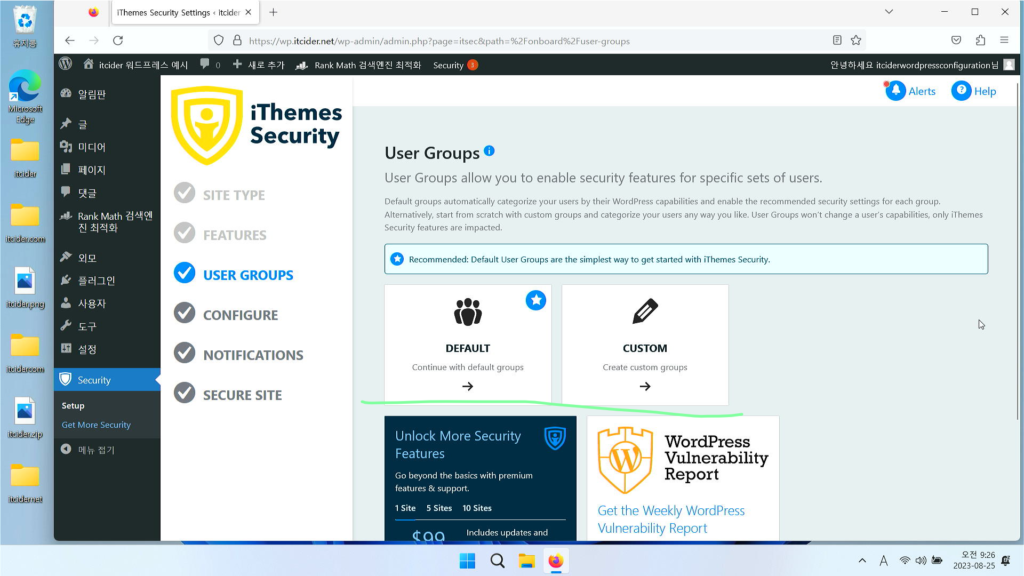
이 워드프레스에 대해서 일반적인 사용자 그룹만으로도 충분하다면 default, 여러 그룹을 줘야한다면 custom 옵션을 사용해주시면 됩니다.
default로도 충분한 설정이 가능하므로 default로 진행하겠습니다.
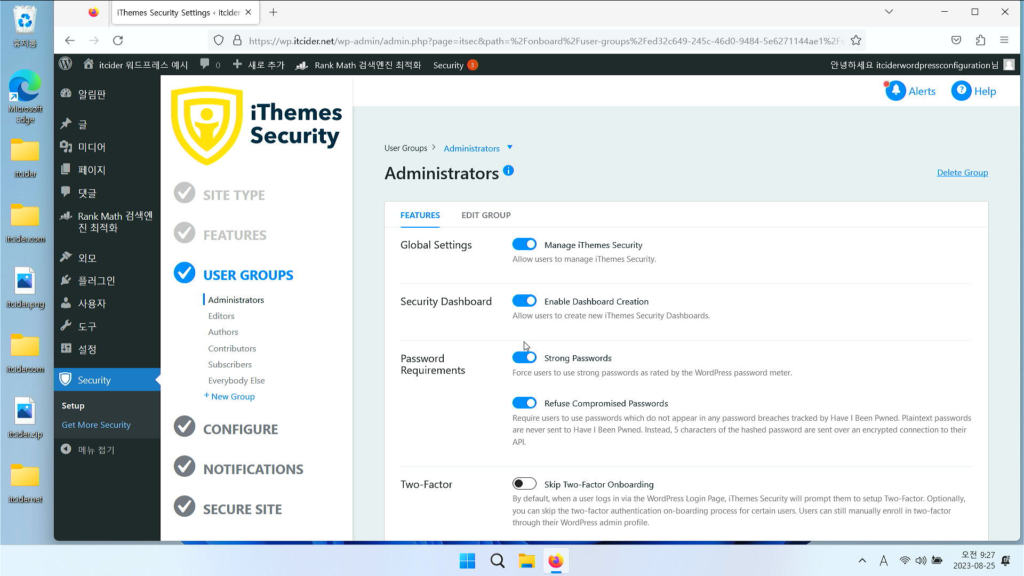
이렇게 user groups가 나오고, 관리자인 adminstrator에 대해서 나오는데,

이 설정은 굳이 해주실 필요가 없으므로 아래로 내려주세요.
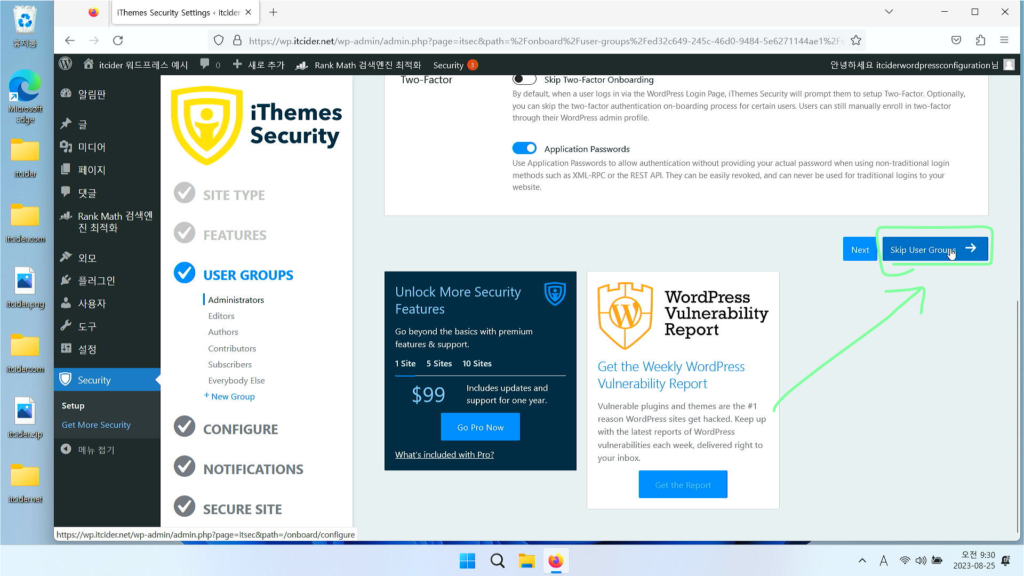
아래로 내려서 skip user group을 눌러주세요.
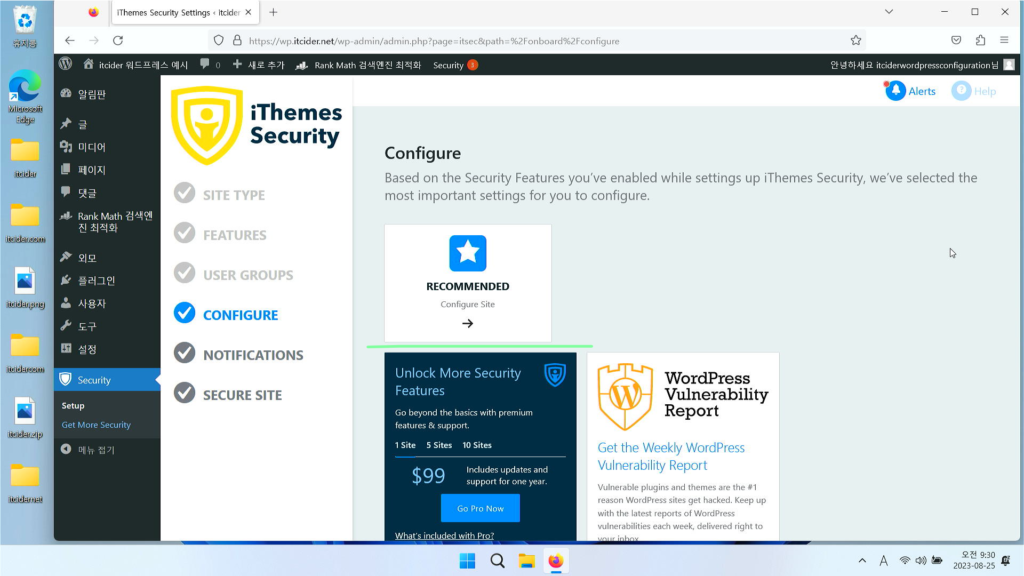
이렇게 configure 항목이 나오는데, recommended를 눌러주세요.
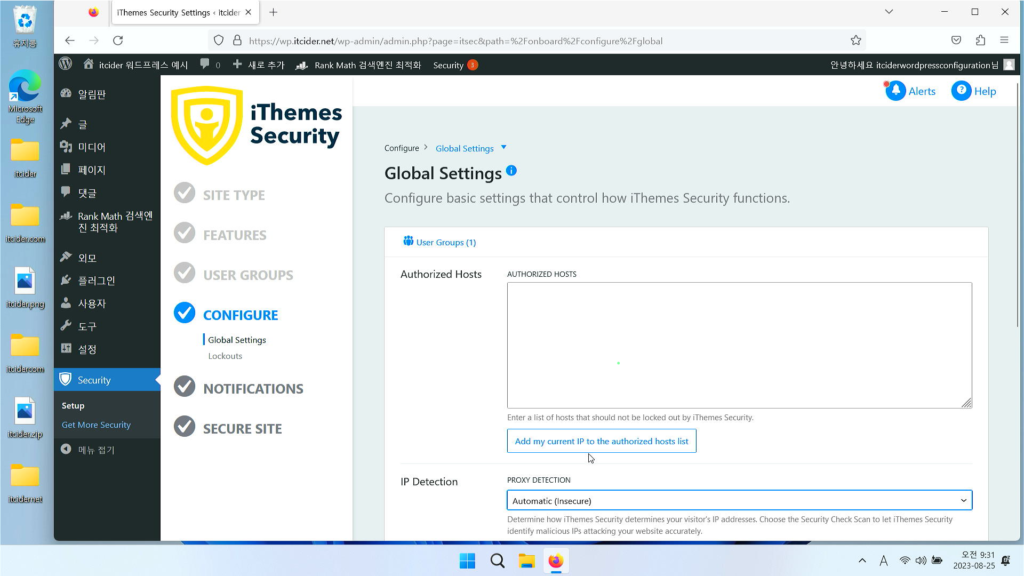
이렇게 신뢰할 수 있는 ip를 쓰라고 합니다.
다만 ip가 고정되어있을 경우에만 좋은 옵션입니다.
아래로 내려서 next를 누르겠습니다.
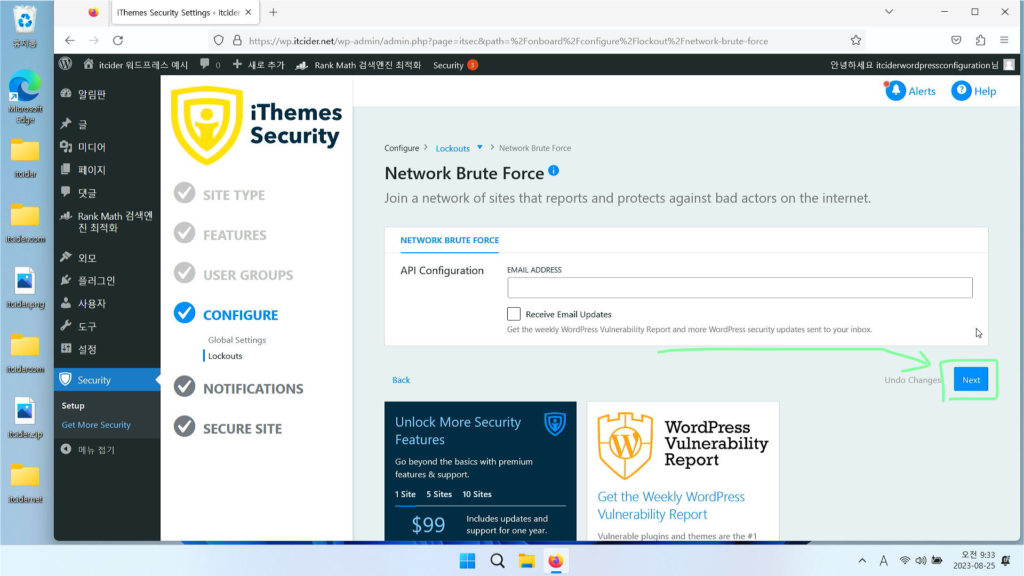
이렇게 network brute force에 대해서 취약성 리포트를 받을건지 나오는데 그냥 [next]를 누르겠습니다.
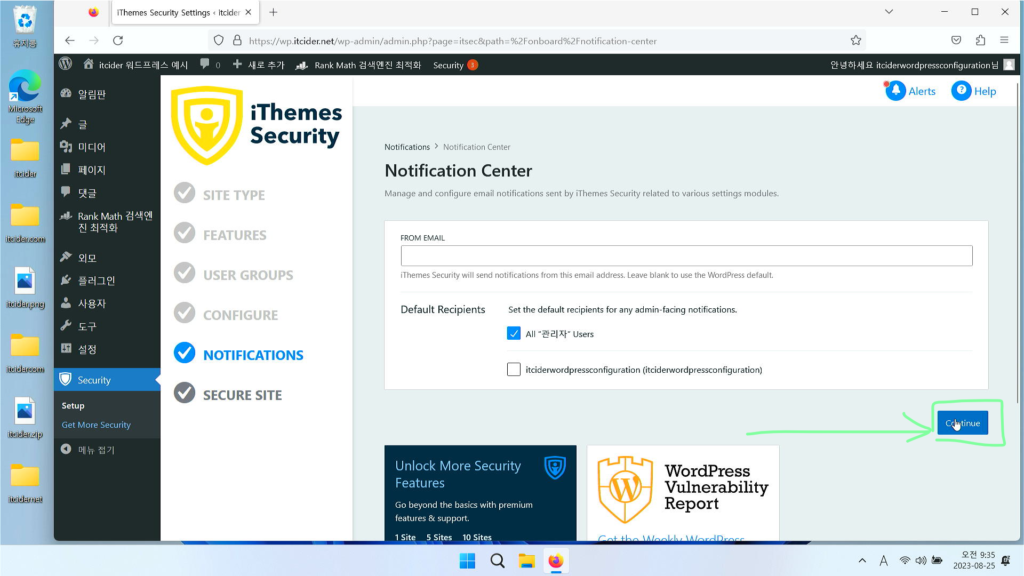
알림에 대해서 누가 받을건지 설정하는 것인데, 이는 관리자가 설정되었다면 [continue]를 누르겠습니다.
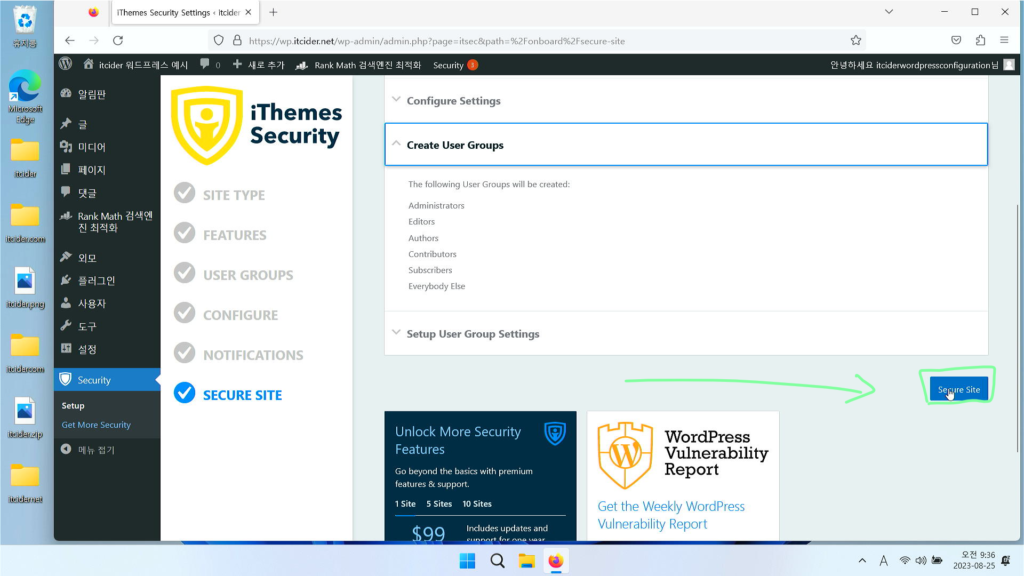
secure site를 눌러서 ithemes security를 활성화하겠습니다.
ithemes 추가 설정 진행하기
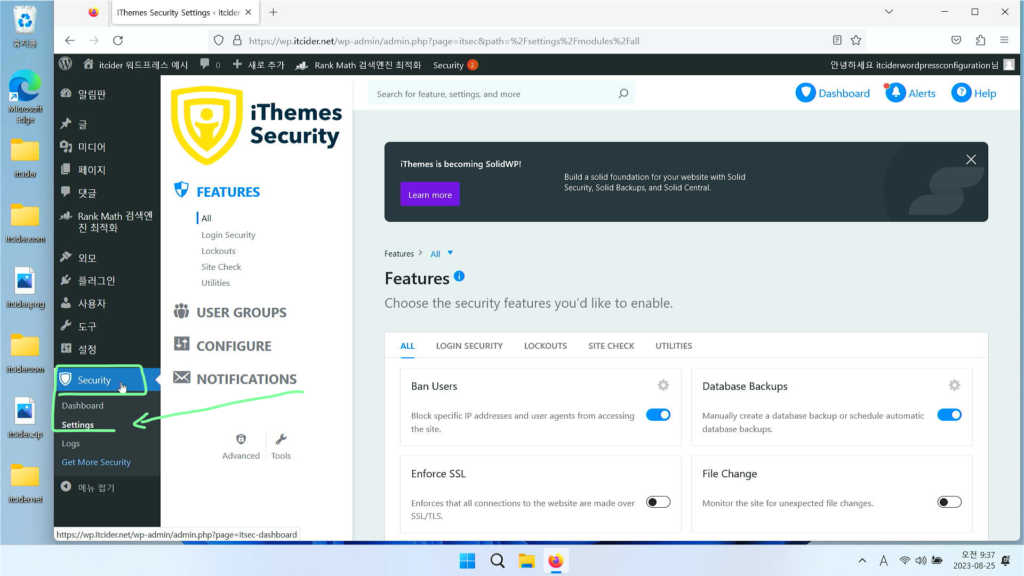
security 아래의 settings 항목을 클릭하겠습니다.
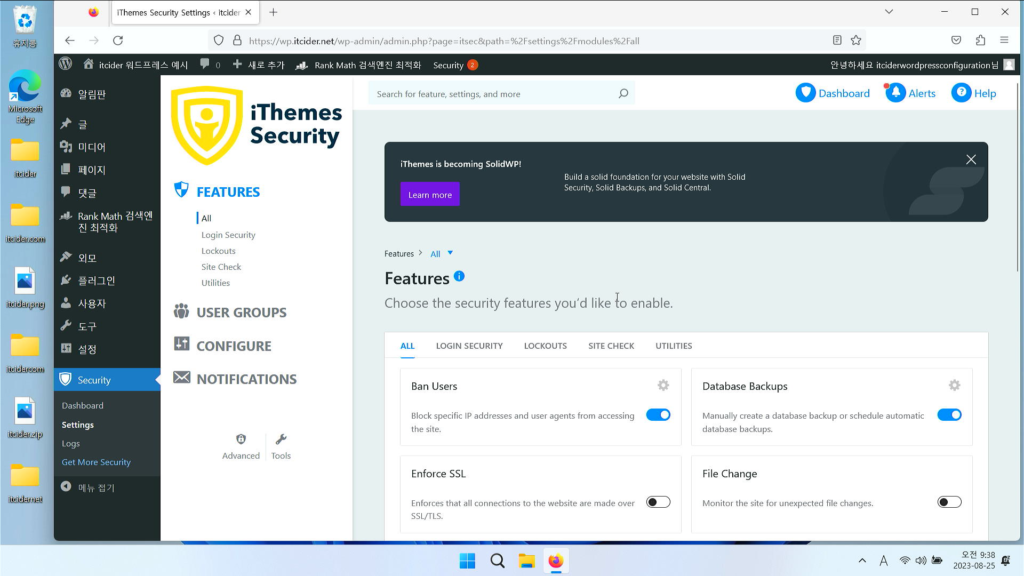
이렇게 features 항목이 뜨는데 아래로 내려주세요.
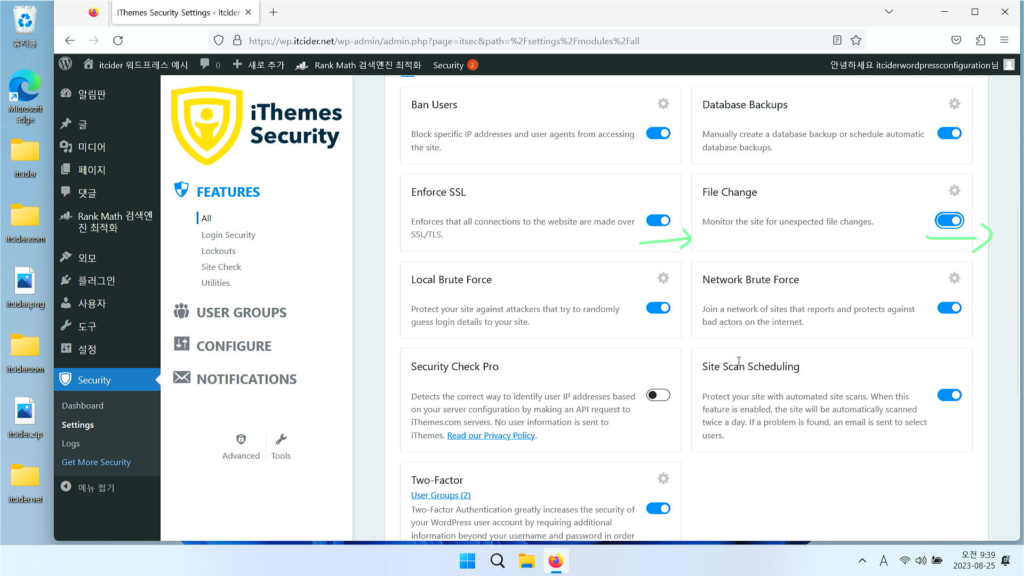
features 항목에서 enforce ssl과 file change를 눌러주세요.
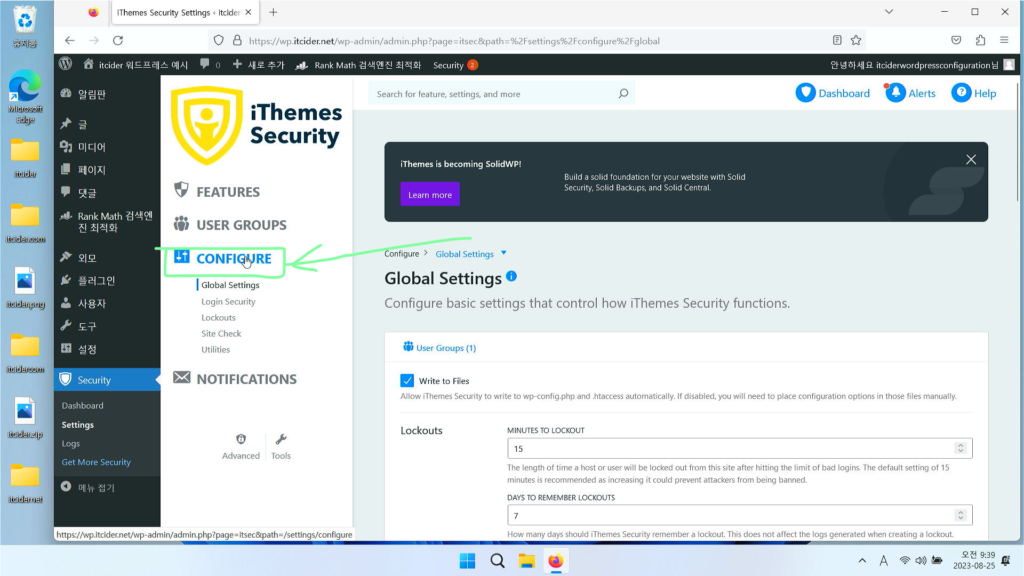
이제 [configure]을 눌러주세요.
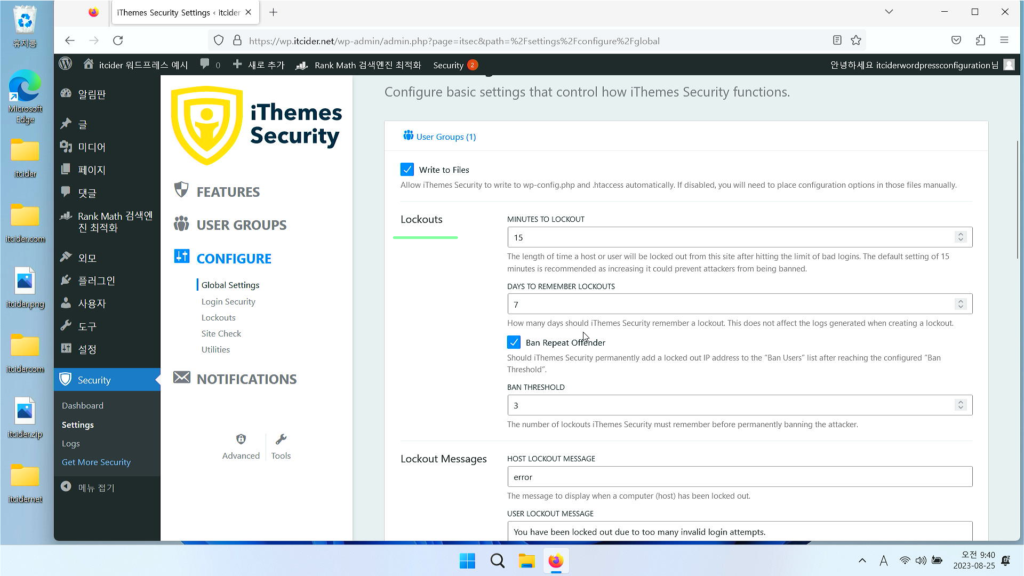
lockouts 항목이 있는데, 여러번 잘못된 로그인을 시도할 경우에 차단되는 옵션입니다.

minutes to lockout은 몇분동안 차단할 것인지,

days to remember lockouts는 며칠동안 기억할 것인지,

ban threshold는 몇번 시도시에 차단할 것인지에 대한 옵션입니다.
원하는대로 설정해주세요.

lockouts에 들어가시면 local brute forces가 나오는데, admin user는 ban해주세요.
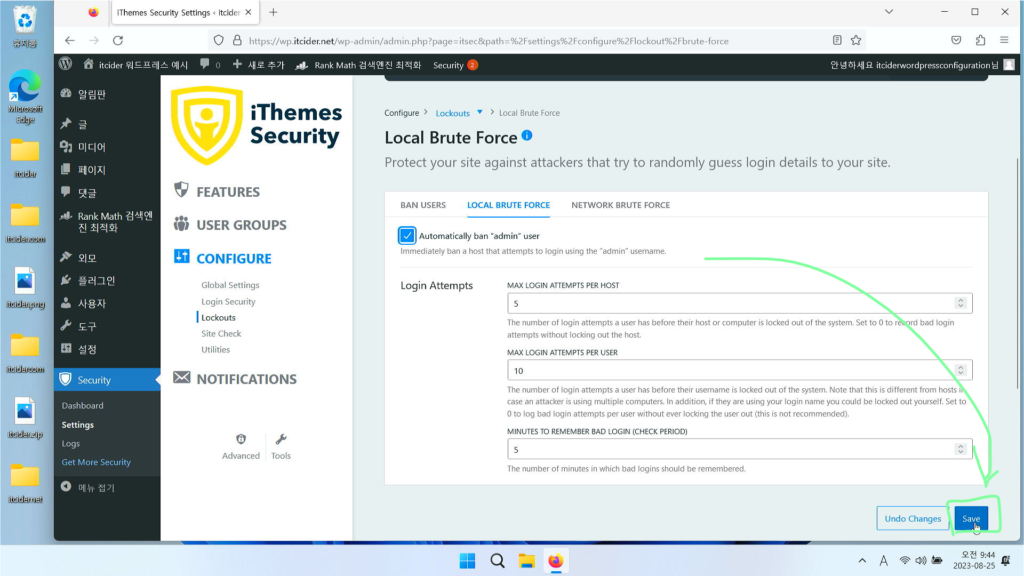
우하단의 저장 버튼도 눌러주세요.
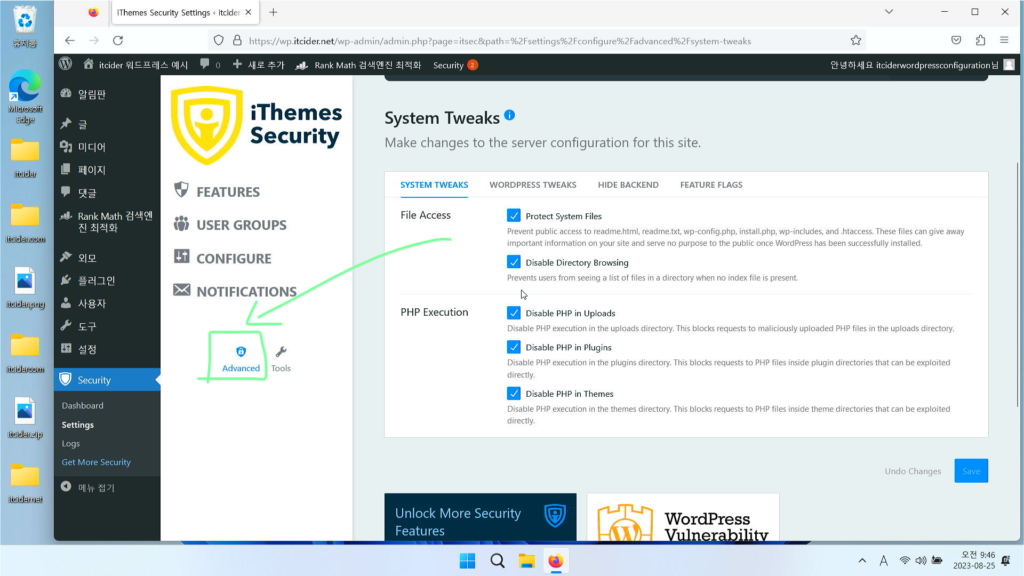
advanced 옵션이 있는데, 이 옵션에 들어가주세요.

wordpress tweaks를 눌러주세요.
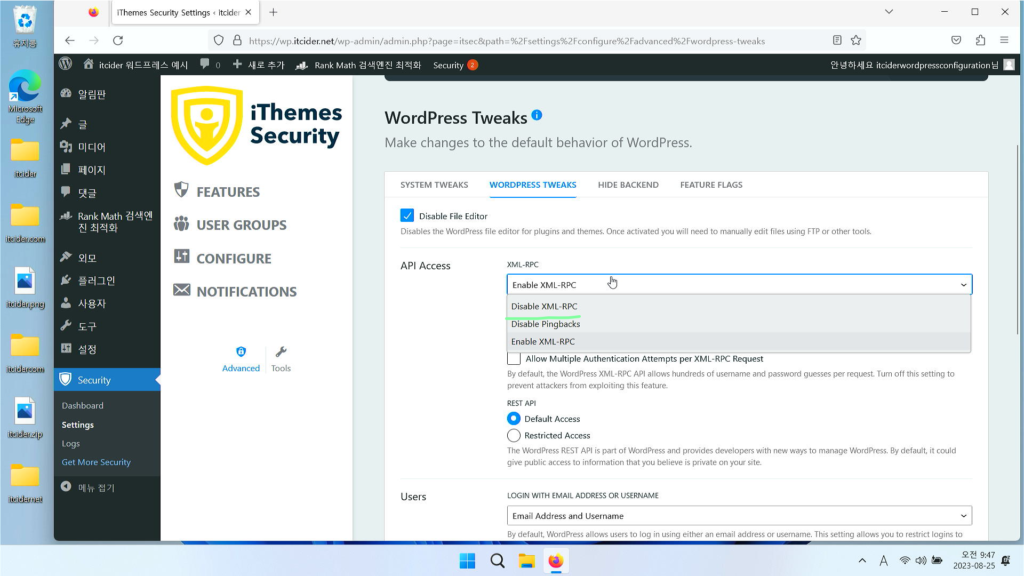
xml-rpc가 있는데, 워드프레스 앱을 이용하시지 않으시다면 끄시는 것을 추천드립니다.
disable xml-rpc를 눌러주세요.
우하단의 save를 눌러주세요.

hide backend 옵션이 있는데, 이 옵션은 wp-login.php 대신 특정 uri를 사용하게 하는 옵션입니다.
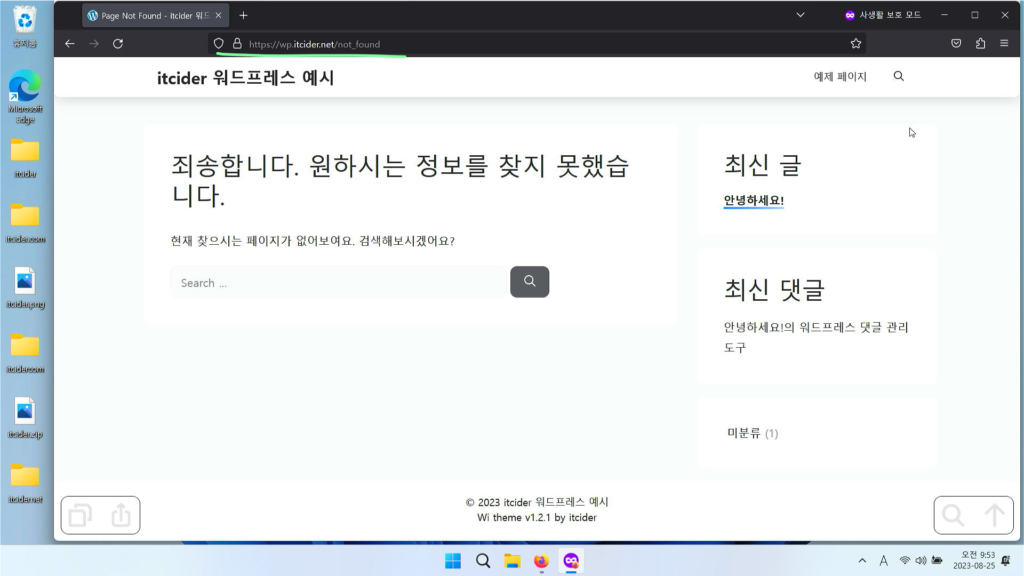
이렇게 /wp-login.php를 들어가면 로그인이 불가하게 뜨고,
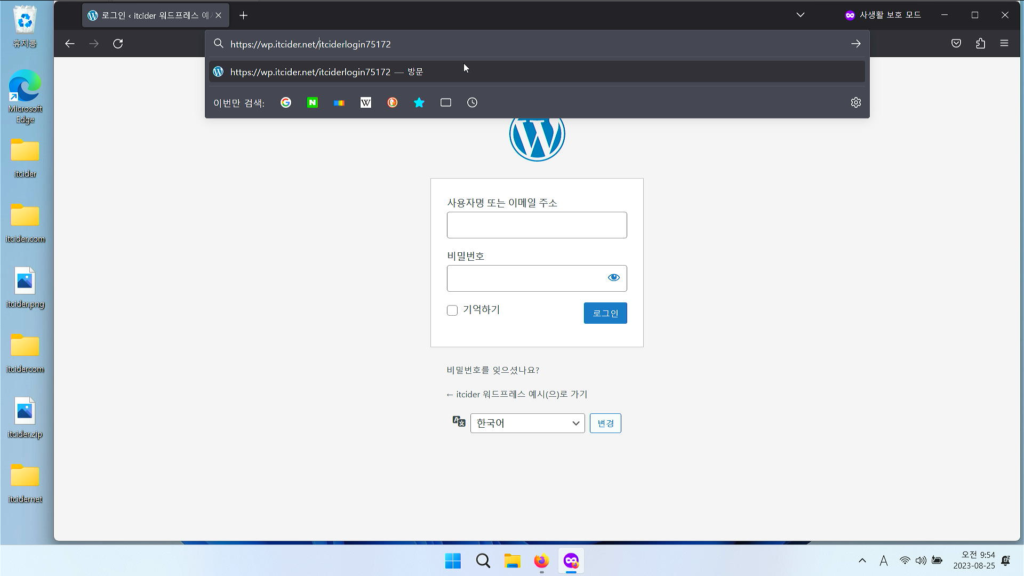
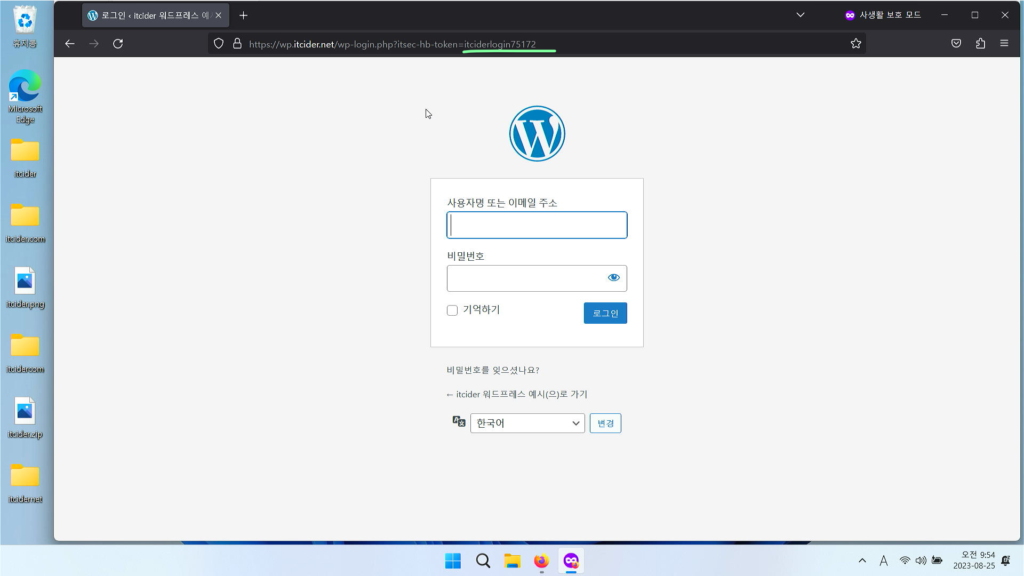
아까 지정한 url을 워드프레스 주소 뒤에 붙여주시면 정상적인 로그인창이 뜨는 것을 볼 수 있습니다.
이정도면 기본적인 ithemes security에 대한 설정이 완료되었습니다.
궁금한 점은 itcider의 sns나 댓글로 남겨주세요~!